Marine Corps University Woodworking Enrichment Program
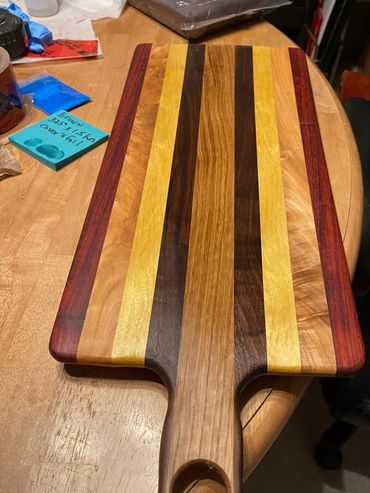
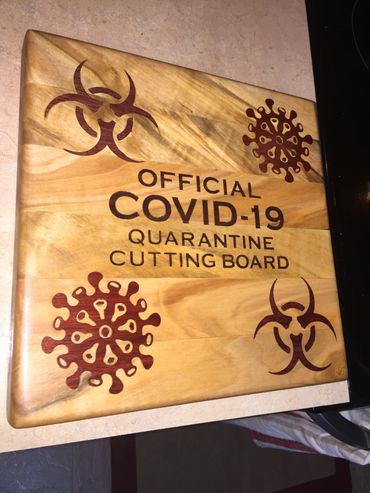
I am delighted to have the opportunity to share my hobby with you. I have been a woodworker since I was a child, but the last few years I have really had the opportunity to expand my hobby. If you choose to take part we will have a great time, and hopefully we will all learn from each other. There are three different options for woodworking projects. To make things easy and to learn the basics of woodworking we are going to start with simple projects that can be completed in a relatively short span of time. The three options are explained below the pictures (the pictures are of EWS students/spouses who have been in the EWS Woodworkers Group).
If you want to do some woodworking but you aren't interested in charcuterie boards or cutting boards, reach out to me and I will see if we can't make a project more in line with what you want to build.
Pick an Option
Basic Charcuterie Board

A charcuterie board is a wonderful way to meats, cheeses, crackers, spreads, and assorted finger foods for parties and gatherings. Participants will work individually as part of a group of 4-5 all learning together. The class will take about four hours and you will leave with your finished charcuterie board. You will learn about wood selection, aesthetic design, and food safe finishes. You will learn to operate a band saw, planer, miter saw, drill press, router, and orbital sander. This is a satisfying easy starter project for someone who wants to dip their toe in the water. The class will take about four hours on a Saturday afternoon and I ask for a $15 donation to cover the cost of materials and consumables.
Edge-Grain Cutting Board

Edge-grain cutting boards get their name from the orientation of the wood. In the picture above you see the orientation of the woodgrain and it gives you a good idea of what your cutting board will look like. This one is made of walnut. Typically cutting boards like this have a "juice ring" for when you use it to carve meats. Because these boards need to be planed, cut, glued, and then re-planed, sanded, the juice ring cut, and finally finished, they will take two or three hours on two different days (4-6 hours) to complete. You will learn about wood selection, adhesives, joining, and food safe finishes. You will learn to operate a table saw, planer, miter saw, drill press, router, and orbital sander. Because this project takes more material I ask for a $20 donation to cover the cost of materials and consumables.
End-Grain Cutting Board
End-Grain Cutting Board

End-grain cutting boards also get their name from the orientation of the wood. End-grain cutting boards are generally considered the gold standard of cutting boards. Companies like Boos sell end-grain cutting boards exclusively. The picture above gives you an example of a walnut end-grain cutting board with a maple star inlay. We won't be doing inlays as part of this class but it gives you an idea of the look. These are the most challenging of the projects but they are still very doable by beginners. I have beginner woodworkers make them every year.
Because these boards need to be planed, cut, glued, then re-planed, re-cut, and re-glued, sanded, the juice ring cut, and finally finished, they will take two or three hours on three different days (6-8 hours) to complete. You will learn about wood selection, adhesives, joining, and food safe finishes. You will learn to operate a table saw, planer, miter saw, drill press, router, and orbital sander. You will also get to watch a CNC machine in action because that is what we will use to finish the top and bottom sides. Because this project takes more material I ask for a $25 donation to cover the cost of materials and consumables.
Materials
End-Grain Cutting Board

I will provide a good selections of locally salvaged hardwoods. When trees come down in a windstorm or snowstorm, I collect them and mill them into usable lumber. They are then kiln dried for a few months before they are ready to use. We will be starting with what is called "rough sawn" lumber. I will have healthy supply of walnut, cherry, hickory, and oak. Although oak is not recommended for cutting boards because it is a very porous and brittle wood. I will have several pieces of "double live-edge" boards for charcuterie boards. If you want to use any exotic woods (Padauk, bubinga, sapele, bloodwood, purpleheart wood, zebra wood, etc.) I will have to charge whatever I pay for those because they get expensive quick. My cheap supplier of rough sawn bubinga charges $18 per board foot.
Tools

Woodworking is a hobby where you can never have too many tools. Over the years I have added to my shop a little at a time. It has a table saw, band saw, compound power miter saw, drill presses, planer, jointer, drum sander, oscillating spindle sander, wood lathes, laser engraver, and CNC machine. I also have a collection of power hand tools like sanders, routers, and saw. If you have enough good tools you don't need nearly as much skill. My tools make me look good. I also have eye and hearing protection for everyone but feel free to bring your own if you don't want to use community property.
Instruction

I will make sure you are briefed on all the tools before you use them. If you have some experience, great, listen to the brief anyway. Tools like the sanders drill presses, and planer are low risk tools. But saws can be dangerous if they are not treated with caution and respect. I will walk you through the process, show you how to do the process and then watch you as you get started. I will never ask you to do something you don't feel you are capable of doing (but you have to be will to push your comfort zone a little). I have been teaching the woodworkers enrichment program at EWS for about five years and we are accident free so please help me keep it that way.
Videos to get you Started
Making a Charcuterie Board
This is a very quick and simple video about the charcuterie board making process. Our process will be a little different but I tried to find something that gave you a very quick (under four minutes) overview. Feel free to search YouTube for other approaches. This is just one way and one kind, your wood color, size, shape, thickness, etc. will vary based on your preferences. If that piqued your interest, here is a longer video that walks you through the process but it is a little longer.
Edge-Grain Cutting Board
Again, I went looking for very short videos that will give you the basics of making an edge grain cutting board. If you are interested in a project like this I encourage you to watch other videos. Again, your wood color, size, shape, thickness, etc. will vary based on your preferences. If you are interested, here is a longer video that walks you through the process step by step.
End-Grain Cutting Board
The end-grain cutting board is a joy to behold. It will last for generations and woodworkers have gone nuts over ways to make it. They make amazing patterns, elaborate inlays, and amazing 3D designs that really look three dimensional. Here is a very short video on the basic steps. But if you want to see an elaborate inlay on an end-grain cutting board check out this EGA inlay.
Showing Off


